
If your company is a registered sales tax taxpayer, you will not directly enter numbers for your Sales Tax Return on Annex-C. First, you need to enter the relevant invoices using the Sales Tax Invoice Management feature. Then, the data will automatically appear in your Sales Tax Return. Below are the step-by-step instructions about how to add a domestic sales invoice.
The instructions below focus on the Sales Tax Invoice Management process. If you are a newbie in Sales Tax Returns in general, first learn how to file Sales Tax Return by following our step-by-step guide to filing a Sales Tax Return, and get to know where Sales Tax Annexures originate by reading Sales Tax Annexures Explained.
How to add a domestic sales invoice
1. Open Invoice Management
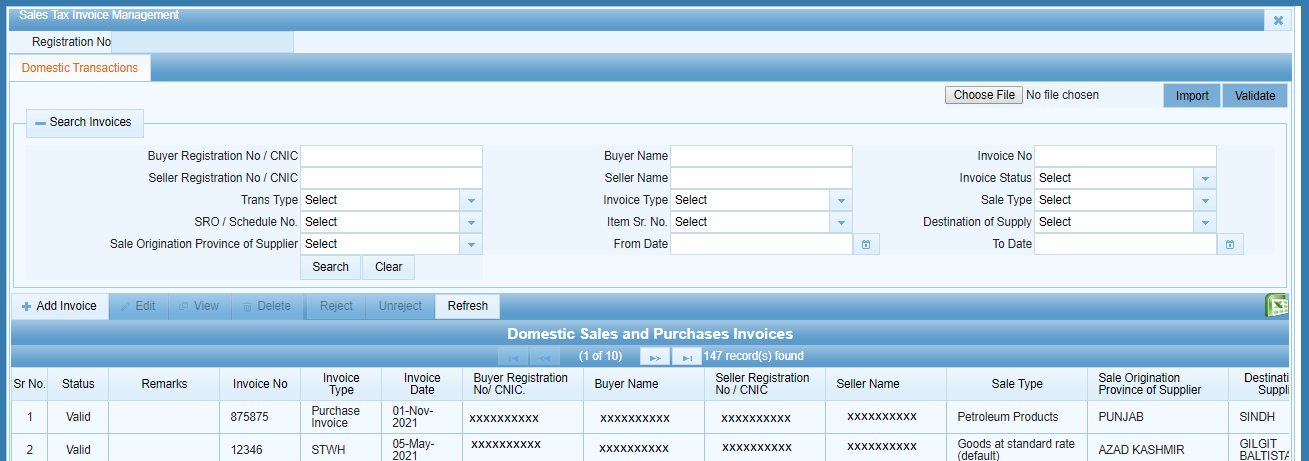
After logging in to the IRIS system, open the Invoice Management module in the mega menu and select the Sales Ledger sub-menu. It will open the “Sales Tax Invoice Management” screen with filters for searching through your invoice records.
2. Click Add Invoice
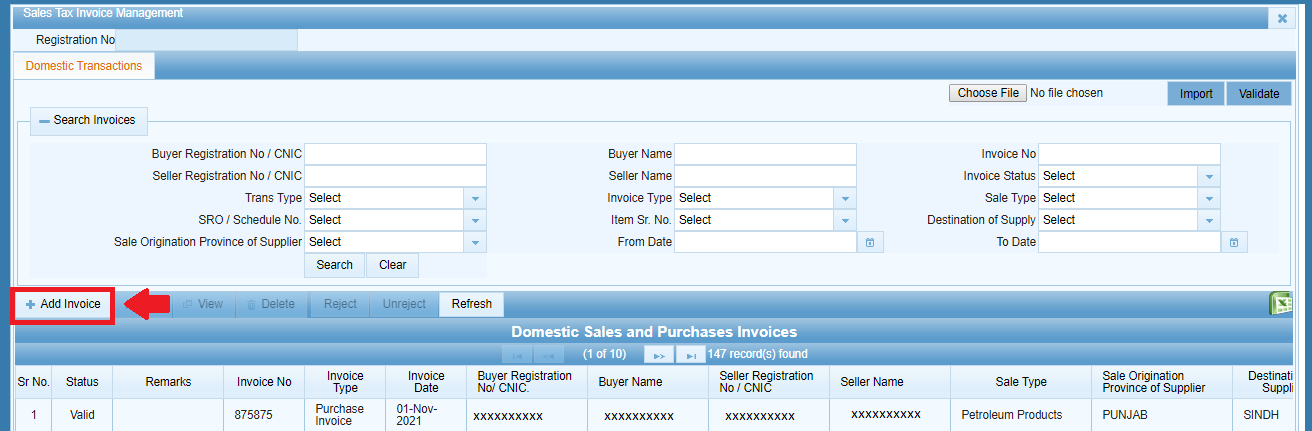
Click the Add Invoice button on the screen for managing domestic transactions to open the invoice details window.
3. Select Sales, Debit Note, or Credit Note
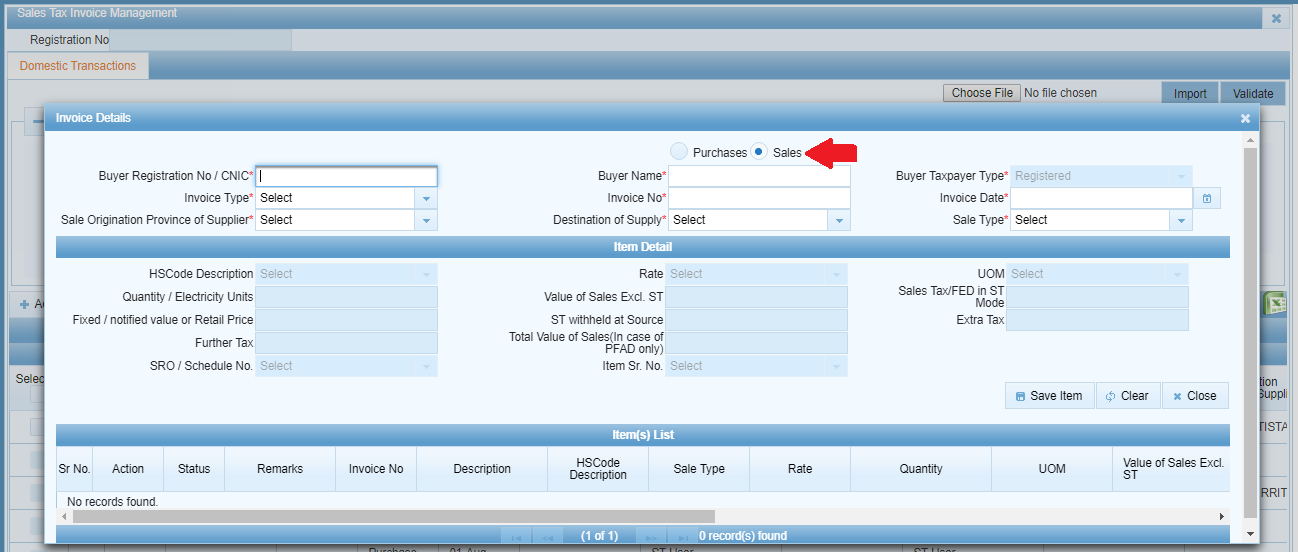
The invoice details window will appear with a radio option to select Sales for a sales invoice or Debit Note/Credit Note for a debit or credit note. By choosing either of the three options, you enable fields specific to the selected type of invoice. All three invoice types are entered using the same window, and data from all three automatically appear in the relevant annexures of your Sales Tax Return.
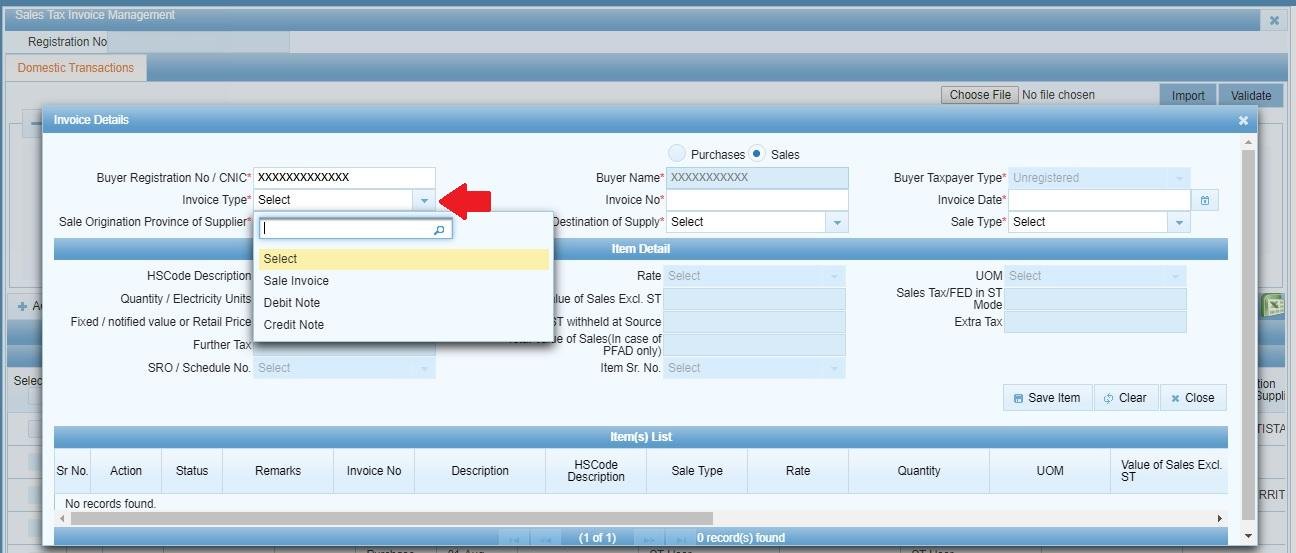
4. Enter Buyer Registration Number / CNIC and Select Invoice Type
After clicking Sales, enter the Buyer’s Registration Number / CNIC and select Invoice Type as Sales Invoice from the drop-down menu.
5. Fill in the Item Details and Save
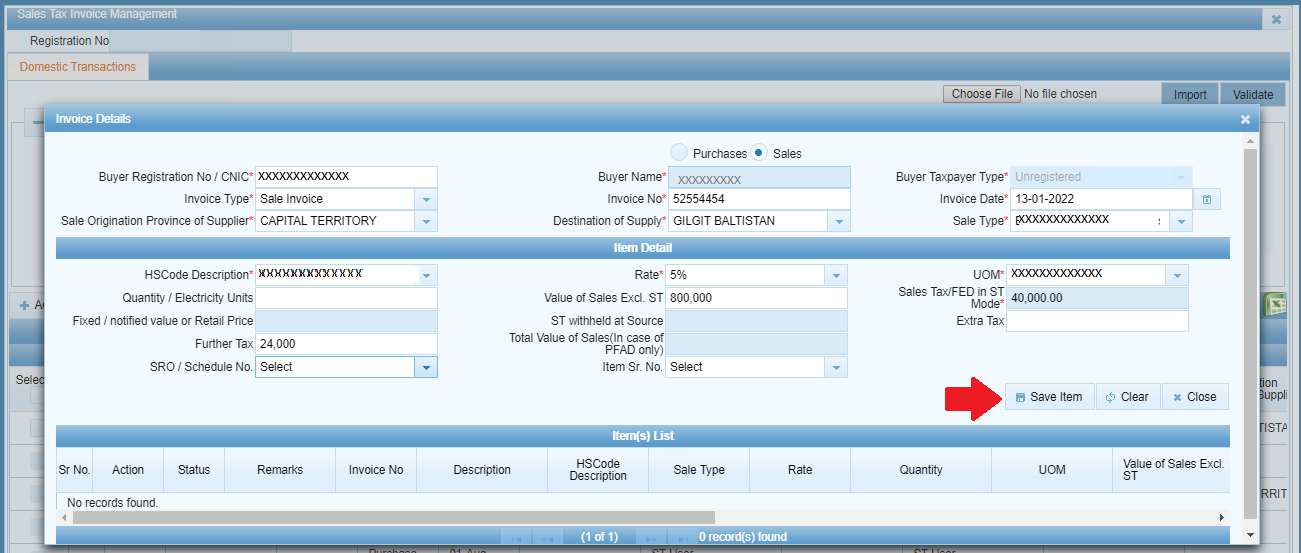
Fill in all of the mandatory fields specific to the item on the invoice and click Save Item.
6. Add More Items to the Same Invoice
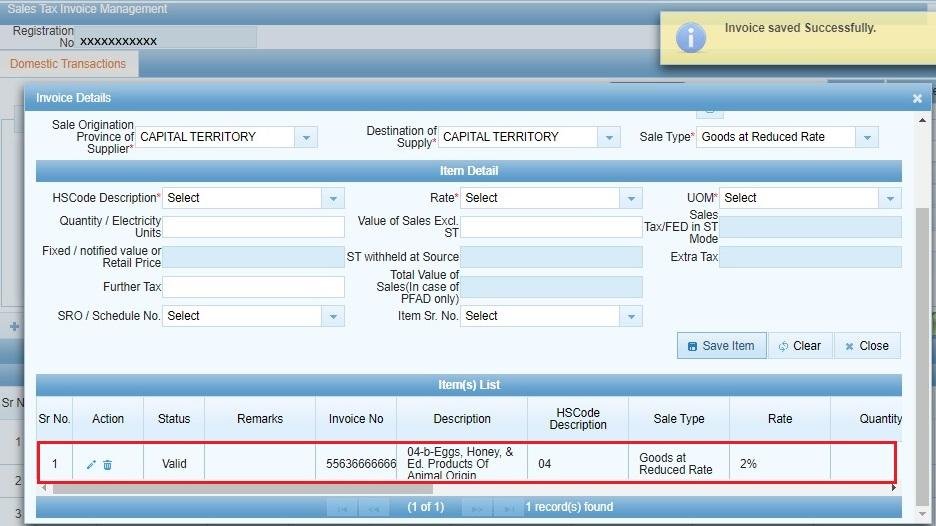
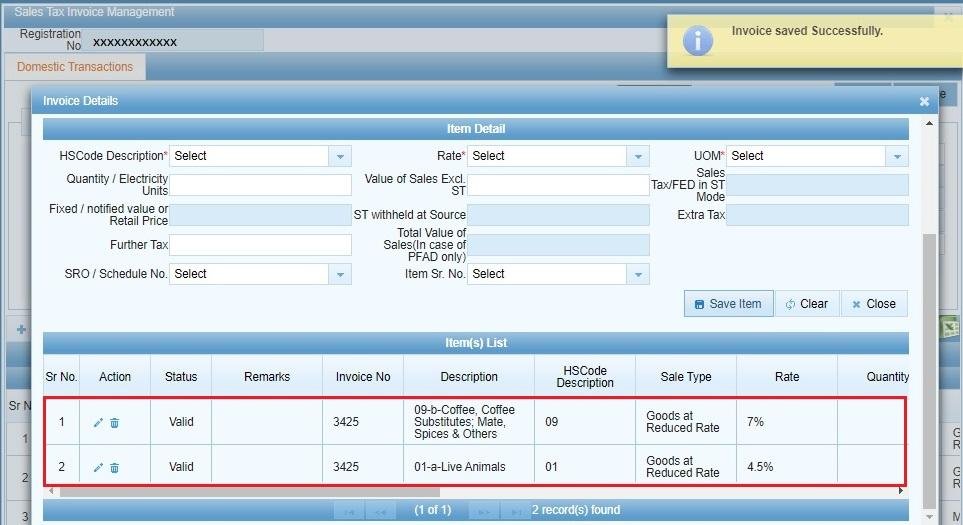
After saving one item, it will appear under Item(s) List with options to edit or delete the saved item. The fields specific to the invoice header will remain filled, so you can click Save Item again to add another item to the same invoice. When you want to add another invoice, click Clear to empty the fields.
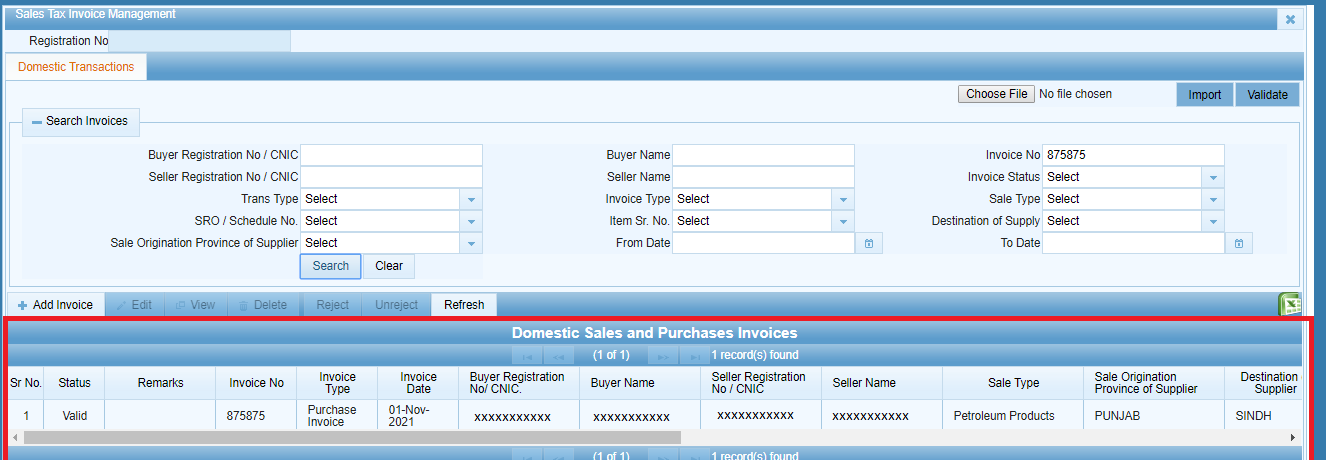
7. Search for Saved Invoices
After closing the invoice details window, you will be redirected to the domestic transactions grid, where you can search for already saved invoices.
8. Load Invoices into Your Sales Tax Return
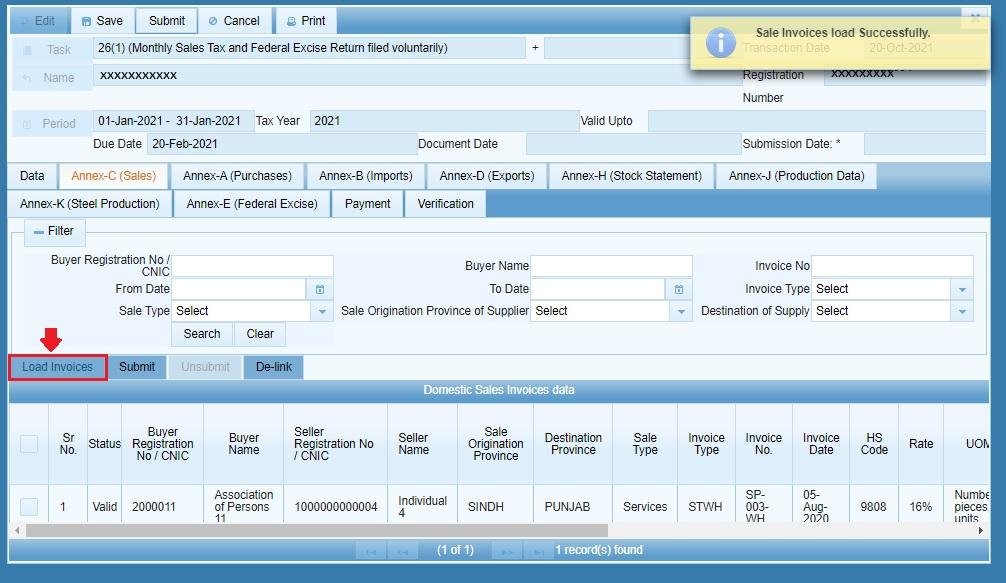
All sales invoices, debit notes, credit notes entered into the system, including third-party invoices reported against your registration, will automatically appear in the relevant annexures when you create Sales Tax Return.
FAQ
Do I need to create my Sales Tax Return before adding my invoices?
No, you can add your invoices at any time. If you have already added your invoices and created your Sales Tax Return, click Load Invoices button to load data from your invoices into the Sales Tax Return. If you created the Sales Tax Return first, simply start adding your invoices using the process described above.
Can I add a Debit Note or Credit Note the same way as a Sales Invoice?
Yes, Debit Notes and Credit Notes can be added in the same way as Sales Invoices, except that when clicking Add Invoice, you need to select Debit Note or Credit Note radio option instead of Sales.
What about third-party invoices reported against my registration?
All invoices (including third-party invoices reported against your registration) already entered into the system will auto-populate the relevant annexures of your Sales Tax Return.
Need help with accurate and timely filing of your Sales Tax Returns? Our sales tax return filing service includes complete end-to-end submission of your sales tax invoices and Sales Tax Return on the FBR IRIS portal.