
Where Sales Tax Return Filing Happens in IRIS
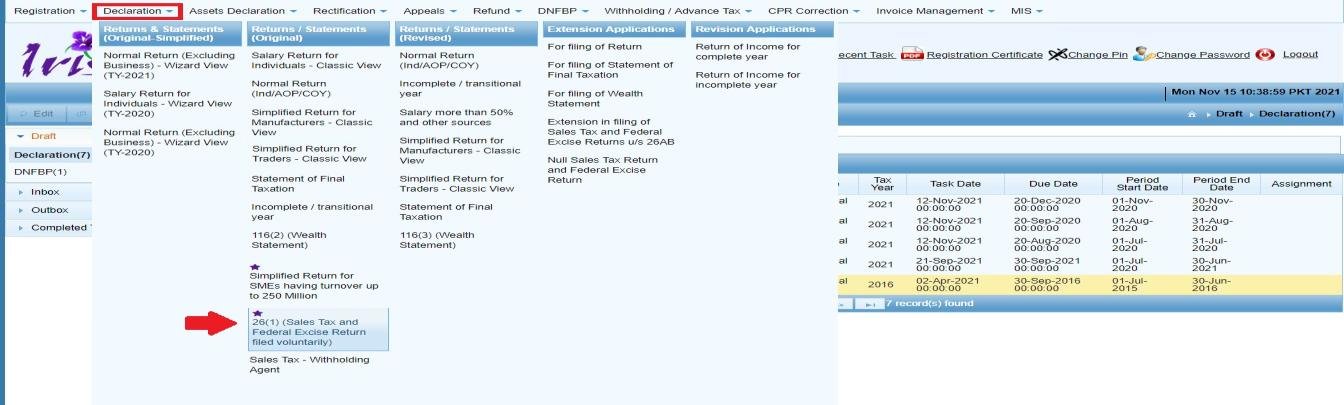
Sales Tax registered taxpayers file their monthly Sales Tax and Federal Excise Return directly through IRIS. Go to the “Declaration” option from the IRIS mega menu, and click “26(1) (Sales Tax and Federal Excise Return filed voluntarily).” This replaces the year-wise sales tax return option in the old e.fbr portal with a single task within IRIS.
Step 1 – Select Your Tax Period
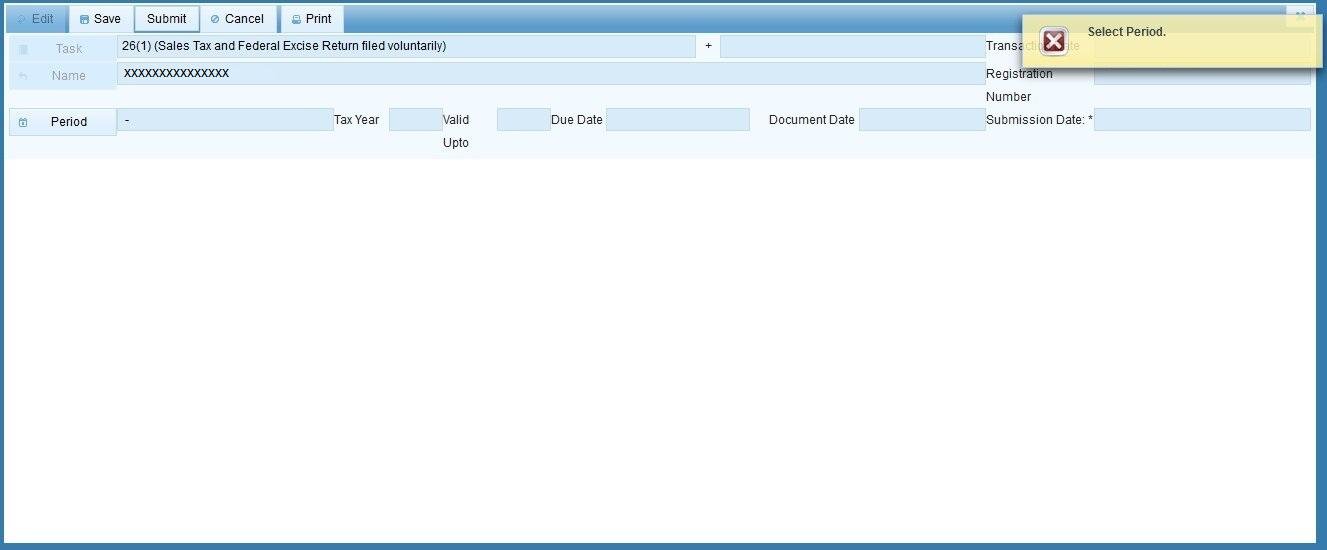
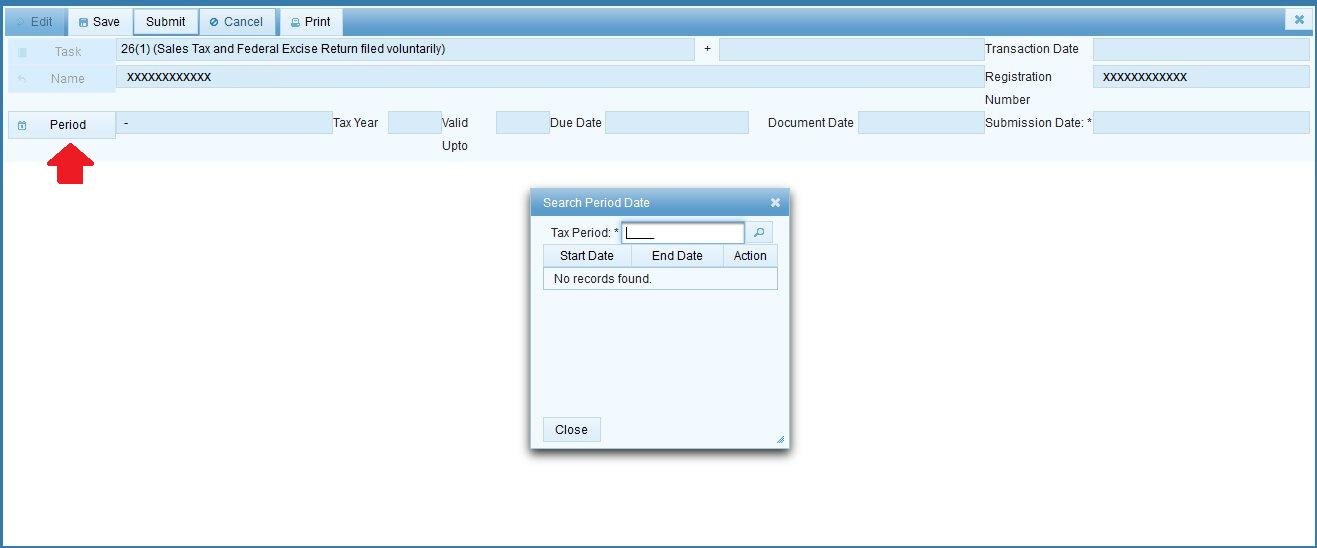
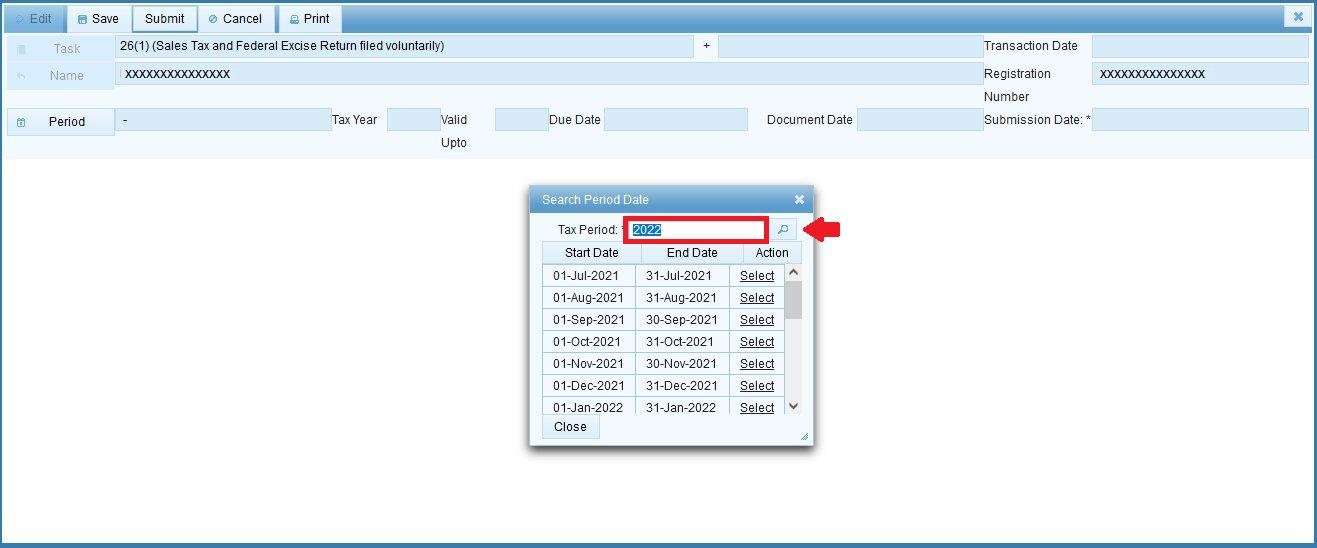
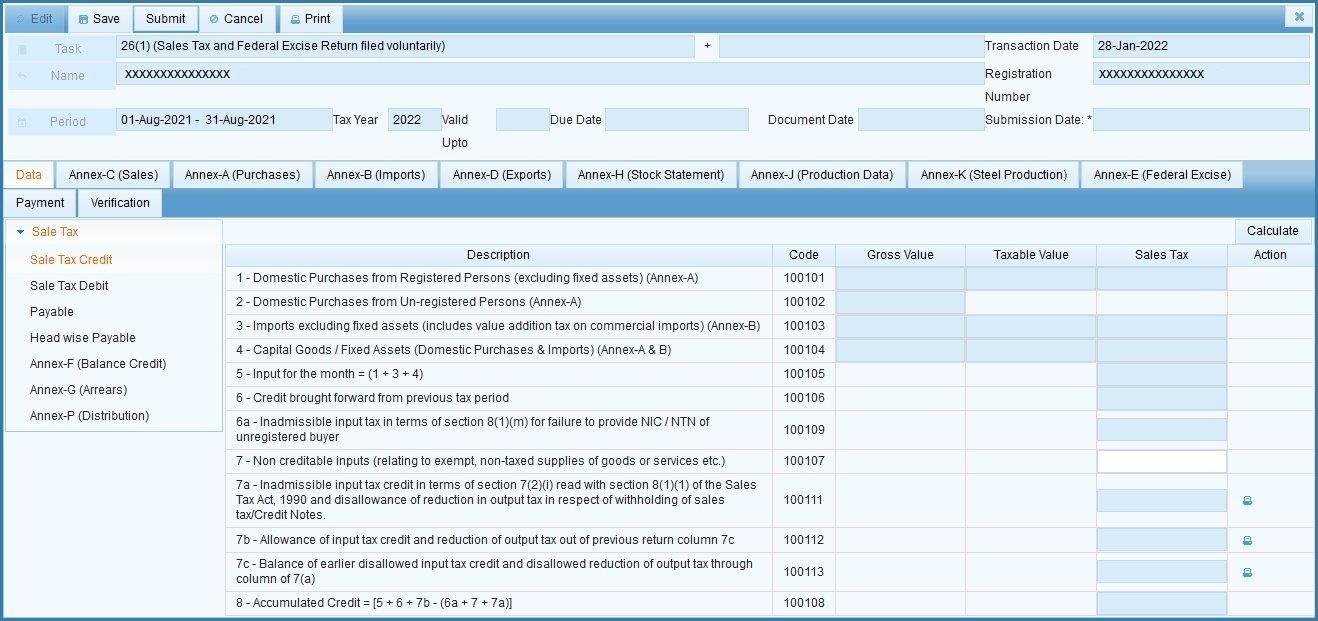
After selecting the 26(1) task, you are prompted to select the tax period that you wish to file your return to. Clicking the “Period” button, you enter the tax year and click the search icon – a list of months appear. You click “Select” against the period that you wish to file, and the main task window will open with the “Data” tab open by default.
Step 2 – Work Through the Data Tab
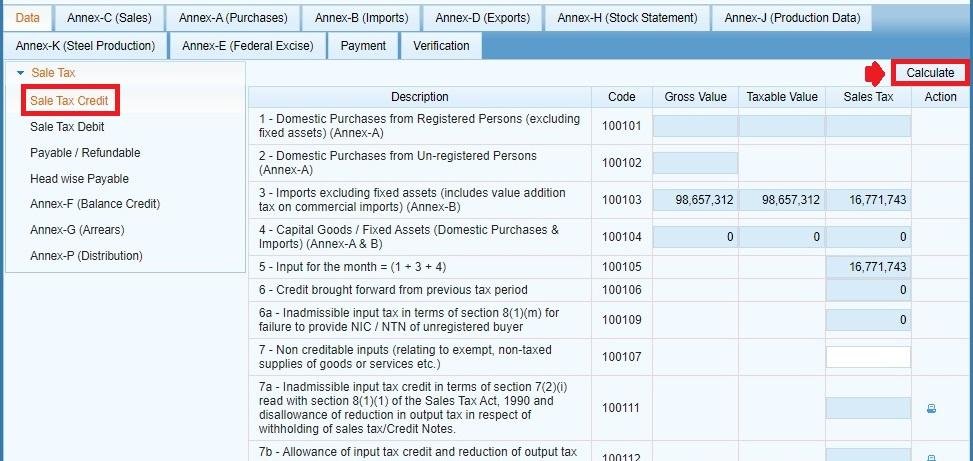
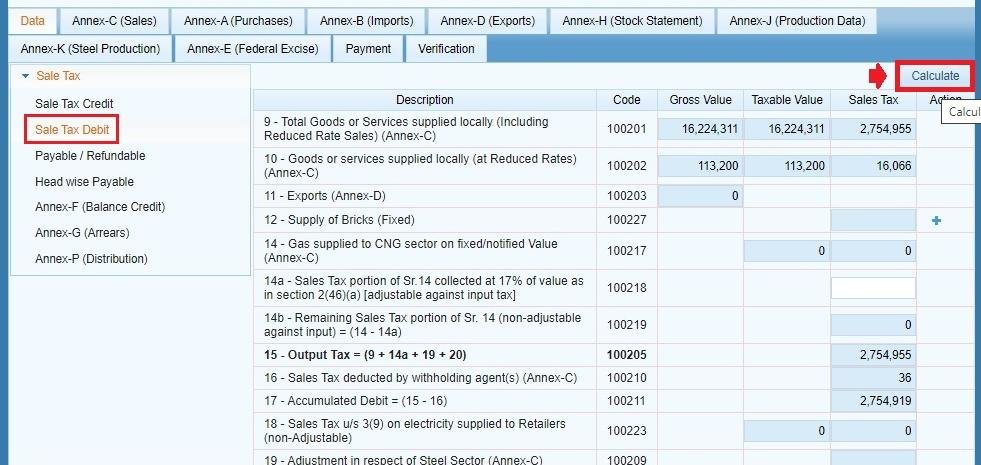
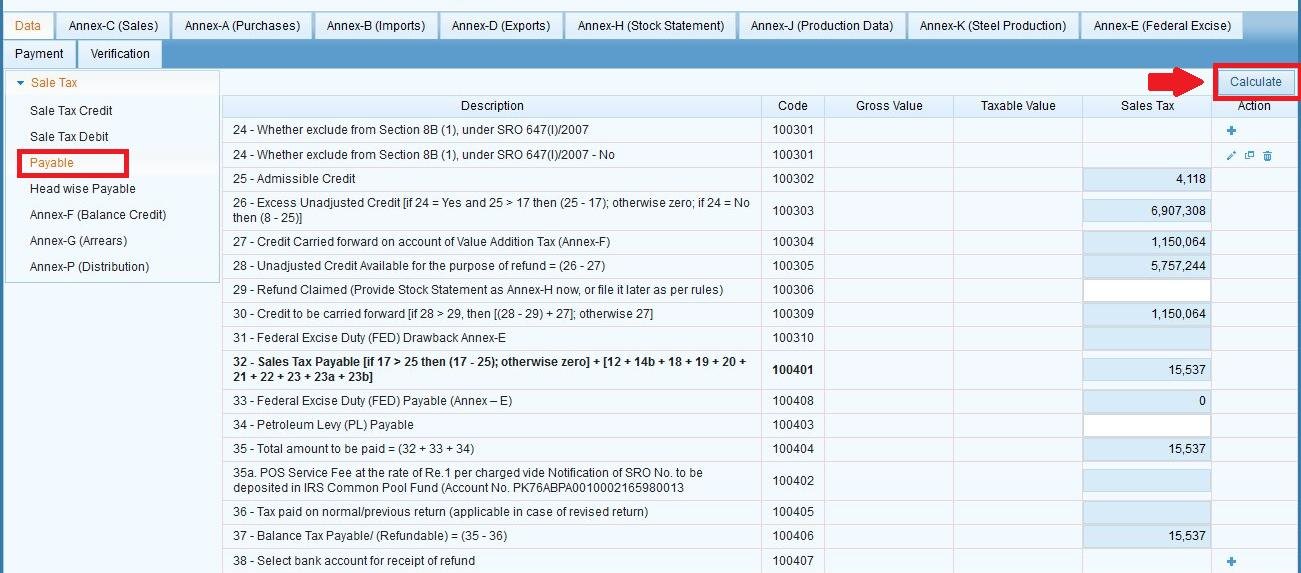
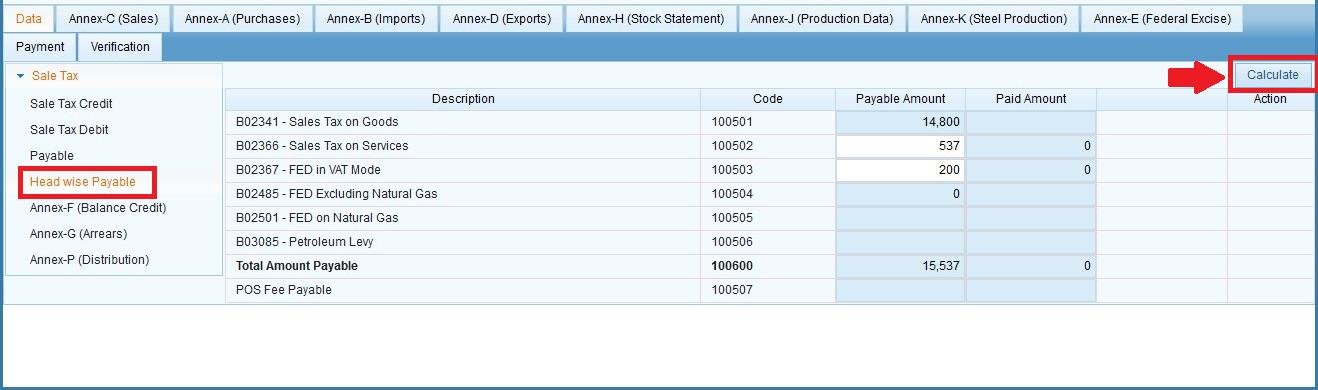
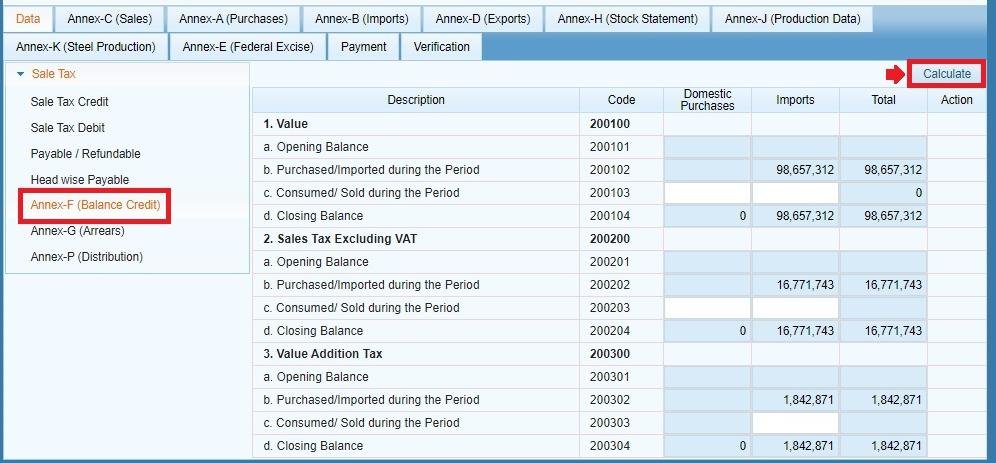
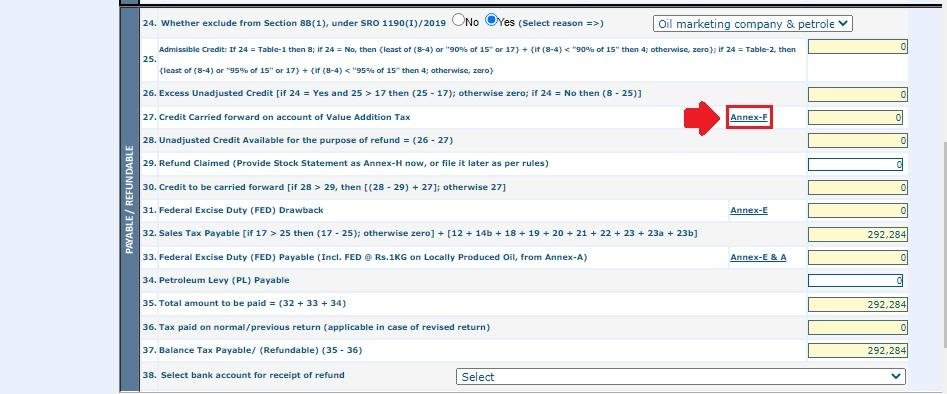
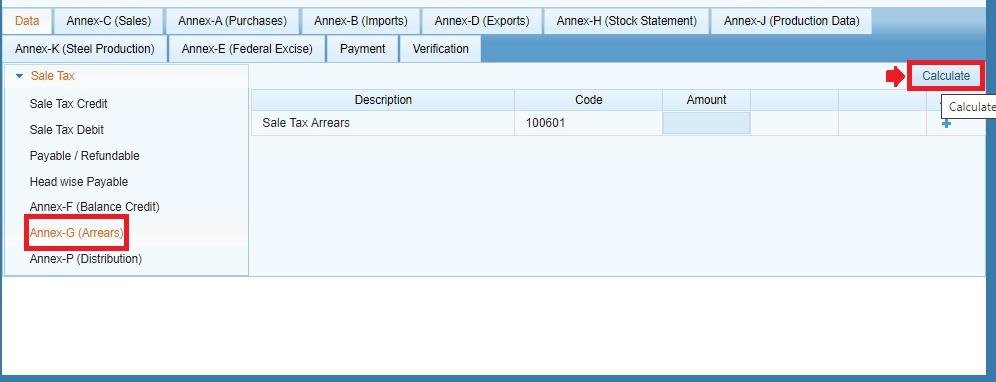
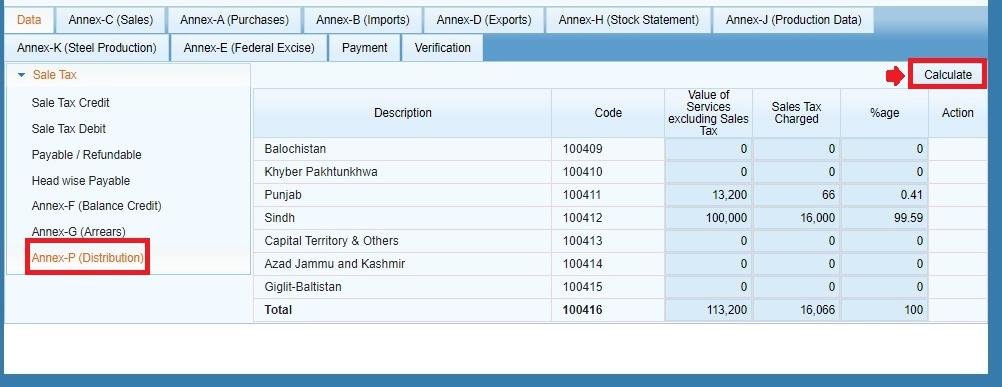
The Data tab collates the necessary calculation of your return. Each tab below has a corresponding link in the left menu, which will open and let you click “Calculate” on the following:
- Sales Tax Credit – your input tax credit for the period.
- Sales Tax Debit – your output tax liability for the period.
- Payable – the net amount payable after credits and debits are reconciled.
- Head-wise Payable – your payable amount broken down by tax head.
- Annex-F (Balance Credit) – any input tax credit balance carried forward.
- Annex-G (Arrears) – outstanding arrears affecting the current return.
- Annex-P (Distribution) – distribution-related figures, where applicable.
Click Calculate on each tab – IRIS will run the calculation and display the results against the respective amount codes.
Step 3 – Complete the Relevant Annexures
The annexures to your return are in tabs to the right of the Data tab. Not all annexures apply to every business – complete the ones which you have made transactions under for the period:
- Annex-C (Sales) – click “Load Invoices” to pull in your sales and ST-withheld invoices for the period, and click Submit. IRIS will confirm with “Annex-C Submit successfully” and enable an Un-submit option if you wish to make changes prior to final submission of your return.
- Annex-A (Purchases) – your input tax claims. Load invoices, filter and search for the ones that you want to claim, select them and click Claim.
- Annex-B (Imports) – click “Load GD(s)” to pull in your Goods Declarations, select the ones that you want to claim, and click Claim. GDs consumed in Annex-K will not appear here.
- Annex-D (Exports) – click “Load GD(s)” to bring in export GDs which match the period.
- Annex-H (Stock Statement) – click “Add Stock,” fill in the mandatory fields and save.
- Annex-J (Production Data) – for manufacturers: manage your product list, select the relevant goods, and fill in the required production data.
- Annex-K (Steel Production) – specific to the steel sector: enter values and add shipment details as required.
- Annex-E (Federal Excise) – fill in the required details, and click Calculate for excise-liable goods.
See our guide to Sales Tax annexures in IRIS for more detail on what each annexure covers, and who needs to file it.
Step 4 – Attach your Payment
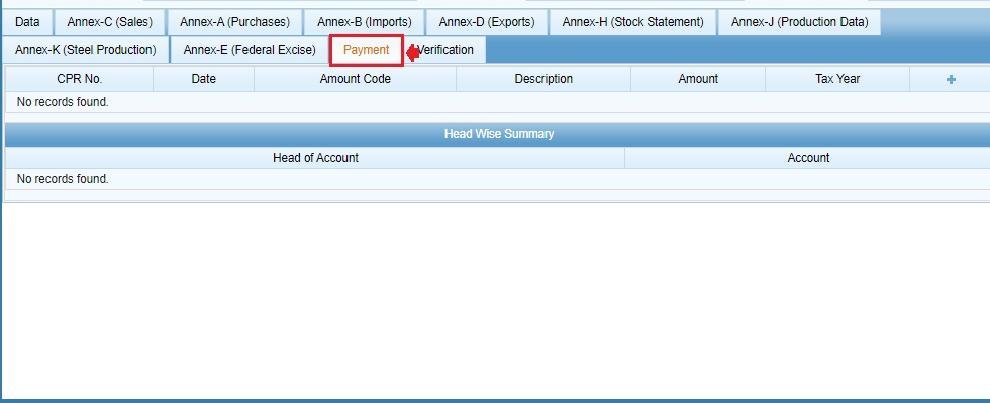
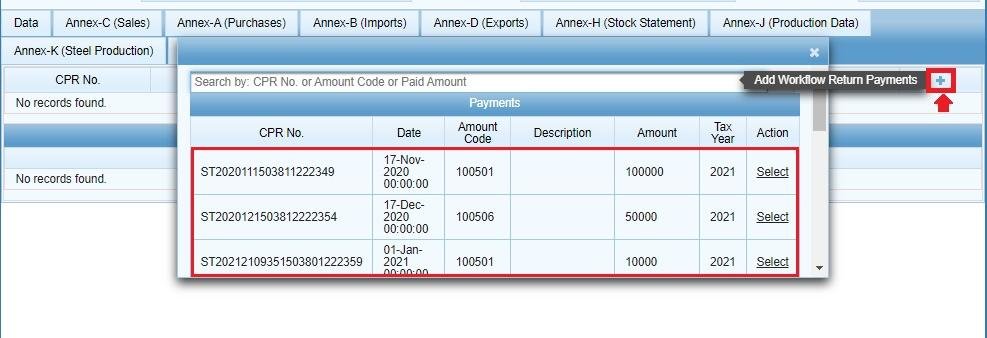
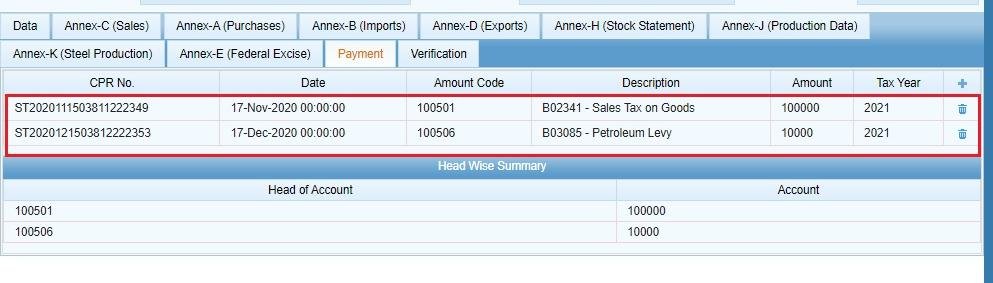
On the Payment tab, click the + icon to attach the Computerized Payment Receipt (CPR) covering tax that you have already deposited at the bank. Enter the CPR number, amount code, or amount that you have paid, to search, and click “Select” to attach it. You may attach multiple CPRs up to your total liability amount.
Step 5 – Understand Clause 7a/7b/7c Before You Submit
If a buyer or supplier in your supply chain hasn’t filed their own return for the period, the relevant unpaid tax will show up in your return under ST-Return Clause 7a – and that party will not be able to submit their own until they can clear it. Once they pay, the amount will move to Clause 7c on their return. See our guide to Clause 7a/7b/7c if your return shows a strange figure here.
Step 6 – Verify and Submit
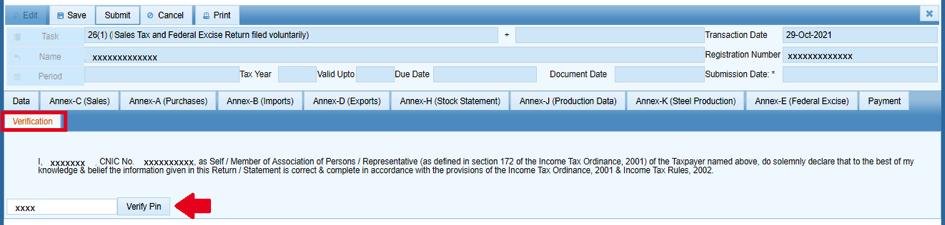
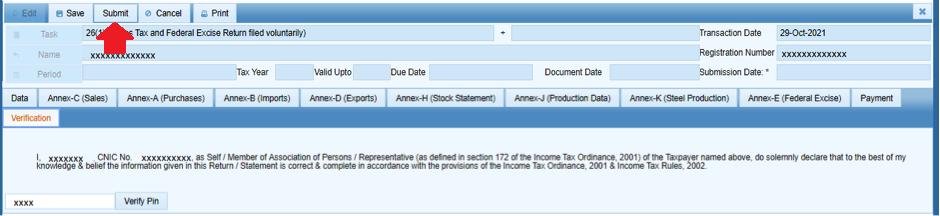
Click the “Verification” tab, enter your PIN code, and click Verify. Then, click “Save” to save your return as a draft (which can be accessed from the Draft section on your IRIS dashboard), or “Submit” to file your return. Once submitted, the return cannot be edited.
See also: Sales Tax Credit vs Debit vs Payable explained, and how to bulk import sales invoices via Excel.
Had no activity for the period? See our guide to filing a null Sales Tax return instead.
Step 7 – Print Your Return
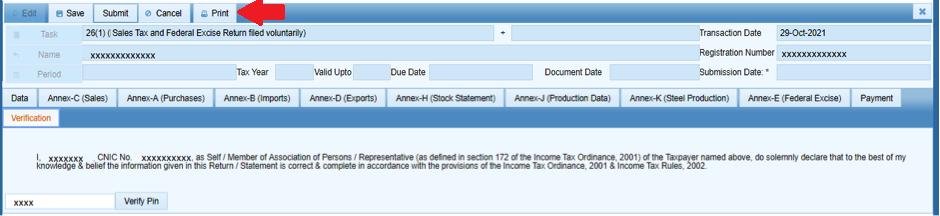
After submission, you can click “Print” to view the printable PDF version of your completed Sales Tax Return for your records.
Common Mistakes We See With Sales Tax Returns
- Not clicking Calculate after loading Annex-C or Annex-A. The figures in the Data tab’s Sales Tax Credit/Debit/Payable depend on the annexures being submitted first – work through the annexures before locking in the amount codes in the Data tab.
- Not checking the Clause 7a before deciding upon a figure being wrong. A non-zero figure is a sign that either a buyer or supplier you are dealing with hasn’t filed, and not a mistake on your own return.
- Submitting before being sure that all relevant annexures have been completed. Once submitted, the return cannot be edited. Review everything relevant (applicable annexures, and the Payment tab) before clicking Submit.
FAQ
Do I have to complete every annexure?
No – complete only the ones which you have transacted in with for the tax period. A trading business with no exports, for example, has nothing to enter under Annex-D.
Can I save my return and finish it later?
Yes – click Save to store your return as a draft, which can be accessed from the Draft section on your IRIS dashboard, and continue later before your final submission.
What happens if I need to fix something after submitting?
Once submitted, the return cannot be edited. Be sure to review everything on each tab before clicking Submit. Especially review all applicable annexures, the Data tab, and the Payment tab.
See Also
A few common questions come up around this filing process: when exactly is the return due each month, and what happens if you file late or miss a month? And – if you are winding down – how do you deregister from sales tax once you no longer need to file?